skip to main |
skip to sidebar
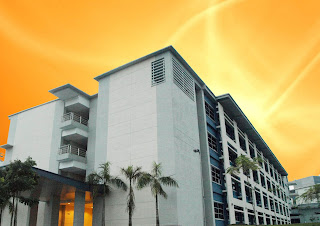
This is the result of blending the FOM building picture and the orange background using the layering.
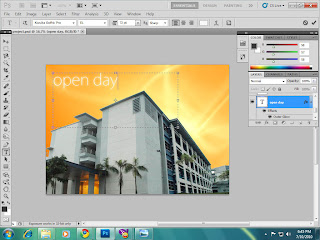
Next, we want to add text into the wallpaper. To add text, we must first add text and use diffrent kind of fonts. For me, this is my font and i choose a white coloured font to adjust with the background itself
Next, we want to create a rectangular box at the bottom of the wallpaper to put the TM logo and contacts in it. so, to do that, Click Shape at the left toolbox and choose rectangal tool, then choose your desired colour of rectangal.
Then, clickon the layer and set the opacity to 64% to make it clearer and bolder.
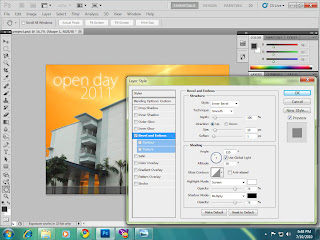
After that, click special effect and choose Bevell and Emboss to make it look glossy.
the script
Saturday, July 10, 2010
Assignment process: Final Adjustment
Assignment process step 4
Well, now we are half way through with this wallpaper. For the other effect, i will show u how to do inner glow.
Since the background is dark, i've decided to use inner glow to highlight the TM university logo . To do that, right click the layer, choose blending option and then choose inner glow. Then adjust it for your own desire
enjoy =)
Since the background is dark, i've decided to use inner glow to highlight the TM university logo . To do that, right click the layer, choose blending option and then choose inner glow. Then adjust it for your own desire
enjoy =)
Assignment Process step 3
This is the result of blending the FOM building picture and the orange background using the layering.
Next, we want to add text into the wallpaper. To add text, we must first add text and use diffrent kind of fonts. For me, this is my font and i choose a white coloured font to adjust with the background itself
Next, we want to create a rectangular box at the bottom of the wallpaper to put the TM logo and contacts in it. so, to do that, Click Shape at the left toolbox and choose rectangal tool, then choose your desired colour of rectangal.
Then, clickon the layer and set the opacity to 64% to make it clearer and bolder.
After that, click special effect and choose Bevell and Emboss to make it look glossy.
Assignment Process Step 2
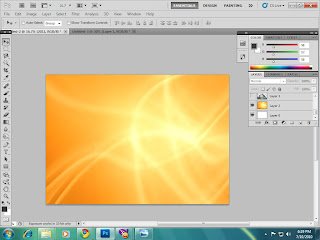
For step 2, take a backgroud of orange colour and brush it using brush tools
This backgroud will be blended with the FOM building picture, which we had taken before
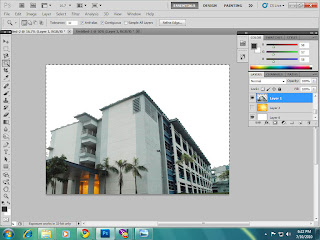
Then, we take the FOM building picture and we crop it using the Magic Wand Tool. Crop it by selecting the sky by using the Magic Wand Tool and select inverse to get the building
This backgroud will be blended with the FOM building picture, which we had taken before
Then, we take the FOM building picture and we crop it using the Magic Wand Tool. Crop it by selecting the sky by using the Magic Wand Tool and select inverse to get the building
Assignment Process Step 1
Well, now we had come to the real deal. How to create a creative wallpaper? It is basically based on your creativeness and some magic touch from the Adobe Photoshop.
1) First, open your Adobe Photoshop, click File> New. You will find that there is a box of customization. Change the preset into international then select into A4.
2) You will find that the page is in potrait mode. To change the potrait mode into landscape mode, just change the height and weight vice versa simultaneously with each other.
For example, the width is 297.01mm and the height is 209.97mm. Change it to width is 209.97mm and height to 297.01mm
3) You will find that the page will become in landscape mode.
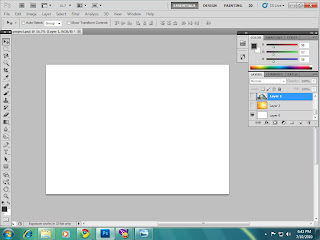
Here is the picture of the screenshot.
Friday, July 9, 2010
Assignment for creating E-Wallpaper
In these assignment, we have been told to complete an E-Wallpaper for Faculty of Management (FOM) Open Day 2010.
I will show you the steps taken in completing this E-Wallpaper.
STEP 1
Find pictures that are related to be blended with this wallpaper.
1) Faculty of Management (FOM) building as the object of the wallpaper. I took this picture from the internet.
https://blogger.googleusercontent.com/img/b/R29vZ2xl/AVvXsEjSmqs9DiBm35ylJqYVY2k_cHyjrAGsa9jvYN8v5deKf45-wMK9X_0Y07kMI27rRn5FJbOwSyJDdtiOJue1VWxZ4NMhrGf4e1FqGjmx6pfC490wZ8r7Ey1UTmWeVvklVx4km5VV0xMI3kk/s1600-h/P3028534.JPG
2) A TM university logo as MMU is the university for TM in creating its human capital
3) A Multimedia University logo.
Subscribe to:
Posts (Atom)
About Me
- Qaliff
- My name is Muhammad Qaliff bin Mohd Bazid. Im currently taking BBA Finance with Multimedia at Multimedia University. This blog is specially made for MMB2014 Digital Media class..Hope u enjoy this blog =)
Blog Archive
Followers
Powered by Blogger.